Make Your Own Bubble (Boba) Tea

DSC_0411

We are blessed enough to live close to a quaint little historic downtown area.  We lovingly call it “the square” as the whole downtown is a big square with green space in the middle with shops and restaurants all around.  It was one of our favorite things about where we live!  One of the little shops is a place that sells bubble tea.  I had never heard of bubble tea until I waltzed in one day determined to try something new.  And I walked out in love.

IMG_0696

And yes, this is an actual picture of our beloved square from 1912.  And yes, it still looks like this (minus the horse drawn carriages…. actually, there are horse drawn carriages!) And yes, the same Marietta where Alton Brown resides.  It’s a cool town.

After talking with my sister-in-law, who is from China, bubble tea is a common drink over there, even though it is Taiwanese.  It is traditionally a black tea or green tea with milk and boba or tapioca.  As soon as I told my sister-in-law I was in love with Bubble tea, she immediately went to her H-mart and bought me rose tea and boba! The dried roses are so beautiful and add such a subtle unique flavor.  And I’m waaaaaaay excited I won’t have to drop $5 a pop whenever I want bubble tea… I can make it myself in under 10 minutes!

DSC_0413

You’ll need a favorite black tea (I used Earl Grey… hot), dried roses or lavender (optional), boba, sweetener of choice, and milk.

DSC_0393

Now, the boba… This is what it looks like in the bag.

DSC_0386

You have to boil it to get it to the right consistency.  It will turn a dark brown (it won’t turn black until it is drained and cooled so don’t worry about the color too much).

DSC_0384

Cook for about 7-10 minutes.  Drain and cool and it will turn black like this.

DSC_0399

Add the boba to a simple syrup (1/4 cup boiling water to 1/4 cup sugar- stir until dissolved).

DSC_0403

Add ice, the steeped tea, and a dash of milk.

DSC_0404

DSC_0407

DSC_0408

And stir.

And if you have trouble finding straws big enough, they sell them here on amazon.  And that’s it! A delicious cup of bubble tea awaits…

DSC_0411-1

Enjoy your bubble tea!!!

signaturetransparent

Copycat Starbucks Coconut Milk Mocha Macchiato

copycat Starbucks Coconut Milk Mocha Macchiato

I swung by Starbucks the other day, as per usual on “Grocery Shopping Day” and noticed they had a new drink on their billboard.  It looked so interesting, I just had to order it.  Coconut Milk Mocha Macchiato.  Little did I know, when I pulled up to pay, the cashier said, “That’ll be $5.50 please.”  Uhhhhhhhhhhhmmmmm.  I immediately wanted to take back my drink order, but not to be rude and hold up the line, I begrudgingly paid my arm and leg for this new drink.  That I might hate.  I pulled onto the road a bit grumpy.  I took a cautious sip of this coffee that didn’t even have my beloved half ‘n half in it.  Turns out (as it usually does) that it was delicious.  And refreshing.  And new.  And exciting.  Honestly, I loved the whole $5.50 experience.  I also knew after studying it that I could EASILY make this myself for mere dimes.  Pennies even.  The marketing specialists at Starbucks are rolling their hands around, exclaiming mwahahaha as they know they can charge ridiculous prices for this “dairy-free” coffee drink.  I won’t give them the satisfaction, I tell you!

And did I mention this is oh so easy to make?  So easy.  And I’ll show you exactly how.

Grab your iced coffee glass of choice.  Personally, I have nothing apart from mason jars in my house.  And I just love these 12 oz. quilted ones.  Then, you’ll need some chocolate syrup (this Torani “coffee syrup” is personally my favorite), some coconut milk, and some leftover strong coffee or fresh espresso.

DSC_0768

First, drizzle some chocolate syrup on the bottom of the glass, just enough to cover the bottom.

DSC_0769

Then, fill 2/3 full with ice and pour coconut milk over until 3/4 full.
DSC_0771

DSC_0773

Then, fill the rest of the way with coffee.

DSC_0775

Macchiatos really are such a beautiful looking drink!
DSC_0778

Drizzle some more chocolate syrup on top (add a Stevia packet or two if you like things a bit sweeter) and voila!  A gourmet $5.50 drink from Starbucks in 1 minute and for a fraction of the cost.

DSC_0779

DSC_0780

Enjoy! (and enjoy that extra money in your pocket 😉 )

signaturetransparent

Crockpot Granola

best granola I've ever tasted and super healthy too- throw everything into the crockpot, so easy!

We love granola ’round here.  On top of our yogurt or mixed in with our cereal or eaten just plain.  I have tried and tried to make my own, but mine has always turned out soggy or burnt or just plain gross!  Is this why they charge an arm and a leg for it at the store??? It must be.  I must just not be cut out for making granola.  Then, I came across an interesting concept…. Put it all in the crockpot and let IT be the one to fail, if failure is even possible for a crockpot.  Surely, a crockpot is a fix all solution.  I mean, when have you ever pulled something out of a crockpot and been like gross?  Hardly ever.  And it must not be the crockpot’s fault… it’s OBVIOUSLY the recipe.  So here I was… dumping oats and other granola goodies into the crockpot, hoping for once that I could churn out some awesome granola.  And crockpot, you have not let me down!  I love you forever! Granola for the win.

DSC_0653

Perfectly roasted oats, crunchy almonds, lightly sweetened.  My crockpot did it.

DSC_0659

DSC_0666

And perfect for one of my go-to breakfasts…

DSC_0663

And if I can’t mess this up, there’s no way that you can, believe me.  If the total granola failure can make a batch of perfect granola, then there is only hope for you.

Crockpot Granola


INGREDIENTS:

5 cups of rolled oats

1 cup almonds, chopped or crushed

1/2 cup sunflower seeds

1 cup unsweetened coconut flakes, optional

1/4 cup coconut oil, melted

3/4 cup honey

1 tsp. vanilla

1 tsp. cinnamon

1/8 cup water

PREPARATION:

In large crockpot, mix all the dry ingredients.  Melt coconut oil and add next 4 ingredients to a medium bowl.  Mix well.  Pour over dry mixture and stir to coat.  Cook on low heat for about 4 hours with the lid ajar to allow steam to escape, stirring every 45 minutes or so.  Spread on wax paper to cool.  Store in mason jars or airtight containers.  You can even add in dried fruit too!

signaturetransparent

Wildflower Cupcakes

I love, love, love making cupcakes.  It’s honestly one of my favorite hobbies of all time.  They’re not too time consuming and the decorations and flavors are endless! I was asked by my aunt to make some wildflower cupcakes for her niece’s bridal shower.  And I couldn’t be more in the mood with all the 70-80 degree sunny weather we’ve been having around here!  I was given this picture from pinterest as inspiration:

9f2480c9bd24d8149c592b91a5937ce5

I mean, how cool are those two-toned roses???  I was excited, yet nervous because I had never attempted to make a two-toned rose before.  But it ended up being so easy!  Check out this awesome tutorial on how to make a two-toned rose!

I used a light yellow buttercream with a pink buttercream as well as one with white and light blue…

DSC_0518

For the white roses, I used a 1M nozzle.  And for the two-toned roses, I used a 2D nozzle.  I didn’t really see much of a difference between the two.  The 2D is maybe a little bit more “flowy”? Both of those nozzles are my go-to for cupcakes.

DSC_0522

For the white “hydrangea” cupcakes, I used the 1M tip as well.

DSC_0531

For the purple flowers, I used a 4B open star tip.

DSC_0536

Here is the set of cupcake tips that I have, and I LOVE them.  It’s fun to experiment and try new styles and designs! Have you tried decorating cupcakes?  It’s really not as hard as you think!  Check out this awesome tutorial below for different ideas on how to make your cupcakes beautiful and professional…


signaturetransparent

Sunday Pot Roast

DSC_0703

One of my New Year’s Resolutions this year is to have a hot meal ready when we get home from church on Sundays, with enough to share with another family.  But with bathing, dressing, and feeding 3 kids, a husband, and myself before 9am, prepping lunch is usually the last thing on my mind.  This is where I’ve decided to become best friends with my crockpot.  There is nothing quite as refreshing as coming home to the succulent smell of lunch already made.  The chopping can be done the night before, and it can take a mere 5 minutes to throw everything together.  All it takes is a little planning.  My hubby brought home a chuck roast that was on sale, and I couldn’t wait to throw it in the crock pot with some veggies.  And boy, I’m glad I did.  And you can’t have pot roast without creamy mashed potatoes and homemade crescent rolls.

DSC_0694

DSC_0697

DSC_0695

DSC_0690

DSC_0710

DSC_0715

DSC_0708

Sunday Pot Roast


INGREDIENTS:

5-6 lb. chuck roast

1 packet of dry ranch dressing mix

1 packet of Italian dressing mix

1 packet of dry brown gravy

1 cup of beef broth

1 lb. bag of baby carrots

1/2 sweet onion, sliced

PREPARATION:

Place chuck roast in the middle of the crockpot.  Pour packets of dry dressing and gravy on top of the roast.  Place carrots and sliced onions around the roast.  Pour the beef broth around the side of the roast, careful not to get it on top.  Cook on low for 9 hours or high for 6 hours.

What are some of your favorite Sunday lunches?

signaturetransparent


Flaky Blueberry Biscuits

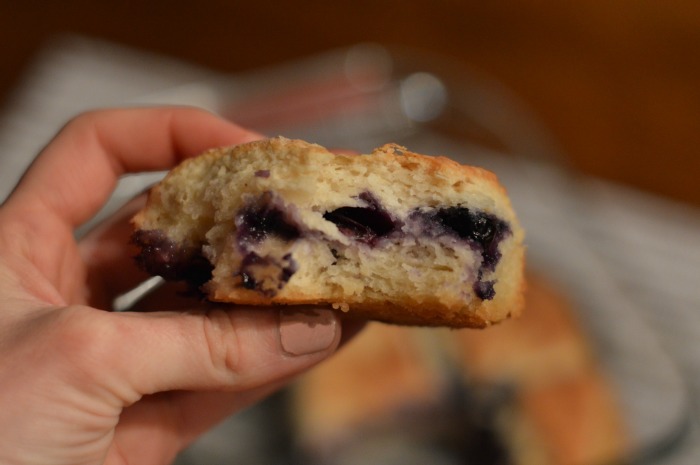
Super flaky mile high blueberry biscuits


Christmas this year decided to grace the South with 70 degree weather.  As much as I love my shorts and t-shirts and flip flops, it was difficult to turn on my “Christmas spirit” so to speak.  I like my Decembers and Christmases cold.  Sue me.  However, with the heat wave, came BLUEBERRIES!  Suddenly, the berries started coming back into season and they didn’t cost $10/lb.  I joke, but seriously.  I got blueberries for $1.88/pint and stocked up.  Suddenly, my house was reminiscent of summertime.   Except by now, the heat wave was gone, and I was left baking blueberry things in 40 degree weather.  Oh well.  At least, I had blueberries.  And blueberries and biscuits?  Just ask Bojangles.  Yum.  Nothing like a flaky, buttery biscuit encasing a mound of fresh blueberries, am I right?

Some flour, sugar, salt, and baking powder go into a bowl.  Cut in a stick of butter until crumbly.
DSC_0606

Next add some buttermilk.  I never have buttermilk, so I use this nifty trick using milk and vinegar.  1 Tbsp. of vinegar into your milk will spoil it in a few moments time, and you’re left with a curdled buttermilk mixture.  Trust me, works everytime!

DSC_0609

Mix your dough until it becomes a crumbly yet mold-able dough.

Meanwhile, melt some butter into a square 8×8 pan.

DSC_0618

Then flour your surface and roll out the biscuit dough into a rectangle.  Place blueberries on top and fold rectangle in half to make a square.

DSC_0612

DSC_0614

Cut your square into 9 equal parts.

DSC_0616

Then, place in the pan with the melted butter.

DSC_0619

Bake in a preheated oven for about 20-25 minutes and voila! Beautiful, flaky, golden brown biscuits with blueberries bursting at the seams.

DSC_0625

DSC_0630

DSC_0633

DSC_0635

DSC_0634

Blueberry Biscuits


INGREDIENTS:

2 cups all purpose flour

2 Tbsp. sugar

1 tsp. salt

1 Tbsp. baking powder

1 stick of cold butter, cut into chunks

3/4 cup of buttermilk or 2/3 cup of milk with 1 Tbsp. of vinegar

1/2 cup fresh blueberries

2 Tbsp. butter for greasing the pan

PREPARATION:

Preheat oven to 400 degrees.  In a large bowl, mix flour, sugar, salt, and baking powder.  Cut in butter until it resembles a coarse meal.  Add the buttermilk or buttermilk mixture and mix until it becomes a crumbly, but mold-able dough.  Melt butter in an 8×8 square pan.  Roll out on a floured surface into a rectangle.  Place fresh blueberries on top and fold over into a square.  Cut into 9 sections and place into pan.  Bake for 20-25 minutes, until golden brown and done in the center.

Perfect for breakfast or as an awesome side for any dinner!

signaturetransparent

Spicy Caramel Apple Pie

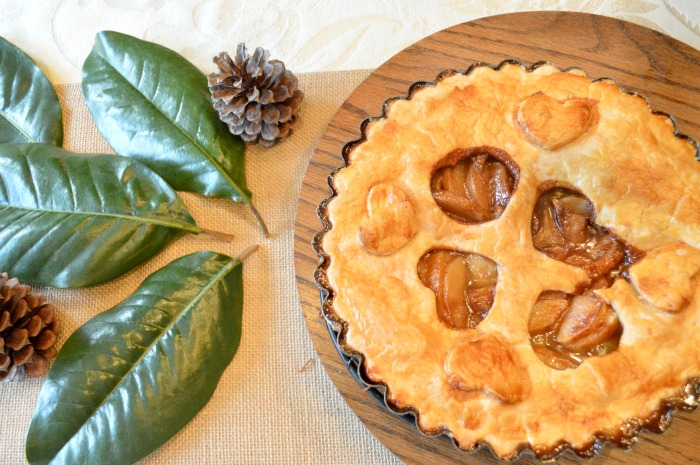
Delicous caramel apple pie with all the Fall spices you love

I’ve recently been dabbling in pie making.  Because I’ve always envied after people who can make delicious AND beautiful pies.  And living in the South, I feel like it’s somewhat of a right of passage to make a good pie.  I’ll be honest, I’m not a huge pie fan.  I love me some pies with a graham cracker crust and a custard like filling, but pies with fruit and stuff in them?  Not so much.  But if I had to choose a favorite it would definitely be apple pie.  But not just any apple pie.  I like my apple pies with spice and thick sauce… the kind you can’t really slice up without making a gooey mess because let’s be honest… those taste divine.  This apple pie just happens to have a thick spicy, caramel like sauce that is just to die for!

You might want to reach for your pie pan because well… we are making a pie, right?  But trust me and reach for your handy dandy tart pan.  Think a tart pan is superfluous?  Think again.  I use mine ALL. THE. TIME.   If you don’t have a tart pan and want one, try looking at your local Goodwill or thrift store.  That’s where I found mine for a mere $2!  So grab your tart pan and about 5 apples.

DSC_0093

And how cool and amazing is my new cobalt cake stand made by my talented pottery making friend from Bunny Hill Studio?  Oh, my goodness, you need to must check out her etsy site.  You will want all the things.  They make fantastic Christmas presents too!

DSC_0088

And why a tart pan, you ask?  Good question!  I love using a tart pan because I love how crispy it makes the pie crust on the edges.  Crispy pie crust = good pie crust.  But you won’t ruin the pie if you use a regular old pie pan.  I’ve made it both ways, and loved it both ways.

And if you’re feeling lazy or getting the onset of “Thanksgiving overwhelmingness” (like me), you can use a little store bought help.  No shame.  But if you want a good pie crust recipe, there’s a great one here.

DSC_0100

And it took me all of 2 minutes to unroll and press into the pan.  Woo hoo! And place it in the refrigerator until you make the filling.

DSC_0106

Next, you’ll want to peel 5 apples.  Everyone has their favorite apple.  I’ve even used red delicious to make a pie *gasp*.  Here I’m using Fuji, but use whatever breed of apple that makes your heart sing.  Pink ladies, anyone?

DSC_0109

Then slice them up.  I like this handy dandy contraption.

DSC_0111

I still find the slices too thick so I slice them once more with a knife.

DSC_0113

Once the apple are all sliced up, add about 1/8 cup of sugar and mix to coat.  Then let sit for about 10-15 minutes.  This helps pull some moisture out of the apples so they don’t take a dive when baking.

DSC_0122

Now, it’s time for my favorite part: the sauce.  Add 1 and 1/2 sticks of butter to a saucepan.

DSC_0125

Then, half white sugar and half brown sugar.

DSC_0130

Now for some spice.  I like Fall spices.  A. Lot.

Cinnamon.

DSC_0134

Nutmeg.

DSC_0135

Dash of Cloves.

DSC_0136

Melt over medium low heat until all melted together and a dark caramel color.

DSC_0139

Time to assemble!

DSC_0140

Apples get dumped into the pie crust, along with the “apple juice” at the bottom of the bowl.

DSC_0141

Then the caramel sauce goes on top.

DSC_0145

DSC_0146

Place the top crust over top and press down the sides.  Pull off the excess crust.

DSC_0147

And make a pretty design on top.

DSC_0155

Top the crust with an egg wash, then place on the very bottom oven rack with a drip pan under it.

And… tada!

DSC_0165

DSC_0166

And if it’s spilling into a heap on your plate, you’ve done it right.  And don’t forget the vanilla ice cream.

DSC_0170

Spicy Caramel Apple Pie


INGREDIENTS:

2 pie crusts

5 apples, cored and peeled and sliced

1/8 cup sugar

3/4 cup butter (1-1/2 sticks)

1/2 cup sugar

1/2 cup brown sugar

1 tsp. cinnamon

1/2 tsp. nutmeg

dash of cloves

egg wash for top (1 egg beaten with water)

PREPARATION:

Peel, core, and slice 5 apples.  Mix in bowl with 1/8 cup sugar.  Let sit for about 10-15 minutes.  Press pie crust into tart pan and place in refrigerator.  In a medium saucepan, melt butter, sugars, and spices together until thick and caramel in color.  Preheat oven to 425 degrees.  Pour apples in crust in tart pan.  Pour caramel sauce over top and spread to get even.  Place second pie crust over top and press to seal.  Remove excess crust.  Make a design in the top crust or vent.  Brush egg wash over top of crust.  Place tart pan on a lipped baking sheet and place on the very bottom rack of the oven.  Bake at 425 degrees for 15 minutes, then lower oven temperature to 350 degrees and bake for another 20-30 minutes.  Let cool for at least one hour before serving.

Happiest of Thanksgivings to you and your families!

signaturetransparent

Simple Cinnamon Rolls with Maple Coffee Frosting

Simple Cinnamon Rolls with maple coffee frosting- Southern Mothers

If I had to pick one dessert…or ehem… breakfast that tops any other, it would definitely have to be cinnamon rolls.  Fresh, doughy, yeast bread encasing a succulent cinnamon sugary center, topped with delectable icing.  What more could anyone want?  If you have to breath a sigh of determination every time you make cinnamon rolls, then this recipe is for you.  And I just happened to stumble upon Everyday Cinnamon Rolls over at Our Best Bites. It’s simple, yet this is BY FAR my favorite recipe ever for cinnamon rolls, and believe me, I’ve tried them all.  So roll up your sleeves, throw on your apron and let’s make cinnamon rolls together!

I follow the recipe to a tee for the dough part, but when it comes to the filling and the icing, I stray.  I tend to do that.  So, go to Our Best Bites and make the dough, but when you’re done, come back over here, and I’ll show you how to make the filling and the frosting.

Instead of brown sugar, I like to combine brown sugar and white sugar and add a bit more cinnamon.

DSC_0740

DSC_0743

DSC_0745

Roll it up and cut ’em up, about 1 to 1-1/2 inches thick.  Plop them in a greased 9×13 pan.  And use butter! Pam will make them have crunchy bottoms…no good.

DSC_0754

The best fool proof way to make the rolls rise is stick them in an unheated oven with the light on with a dish of boiling water underneath of them.  A little trick from Marietta native, Alton Brown… who I’ve seen at Kroger! Yes, I was starstruck.  And he’s awesome.

DSC_0755

And don’t look too closely at my oven… ahem… apple pie spillage.

After about 30-40 minutes, the rolls should be nice and risen.  Immediately bake in a 350 degree oven for 15-20 minutes until golden brown.

Now, that the rolls are done, let’s make the frosting!

DSC_0783

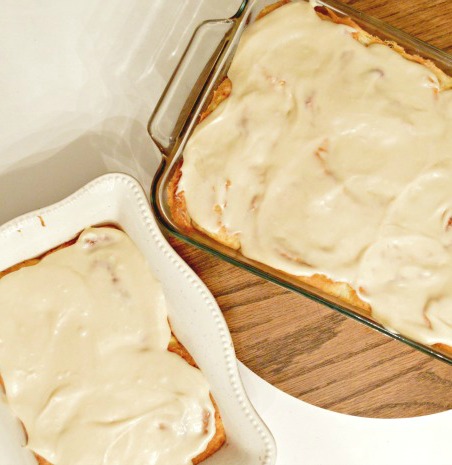
Whip up cream cheese, melted butter, powdered sugar, syrup, and coffee until smooth and caramel in color.

DSC_0798

I like to spread the frosting on the rolls when they have cooled a bit… ‘cuz I like a big, fat layer of frosting.

DSC_0800

DSC_0814

thumbnail

Simple Cinnamon Rolls w/ Maple Coffee Frosting


ROLLS:

Everyday Cinnamon Rolls

Prep and bake also according to instructions.

FILLING:

1/2 cup butter, melted

1/2 cup sugar

1/2 cup brown sugar

2 Tbsp. cinnamon

FROSTING:

1/4 cup butter, melted

3 oz. cream cheese

3 cups powdered sugar

1/2 cup of strong coffee

2 Tbsp. pure maple syrup

Whip ingredients altogether until it becomes a thick, but spreadable icing, caramel in color.  Spread on top of cooled rolls.


Don’t be overwhelmed by cinnamon roll making anymore!

signaturetransparent


Maple Walnut Apple Crisp

Title picture Web Optimized

It just wouldn’t feel like Fall – or Thanksgiving – without something with baked apples, now would it? Sometimes though, the thought of taking the time to make a pie from scratch is a little daunting because, you know, time. This afternoon, I didn’t have a lot of time and I didn’t want a lot to clean up so I turned to one of my favorites, apple crisp. This particular apple crisp (Maple Walnut Apple Crisp, respectively), is sweetened only with maple syrup, another one of my favorite flavors that just sings “autumn.” One of the things I love about this recipe is that it’s not overly sweet. If you like things on the extreme sweet side, you can add some brown sugar – but this way it really allows the flavor of the apples, maple syrup and walnuts shine!

Gather your ingredients – apples, butter, maple syrup, cinnamon, cloves, walnuts, flour, salt and oats.

P1050299

Start with five apples. I had Gala apples today, but my favorite baking apple is the classic Granny Smith, of course.

P1050287

Peel and slice thinly, then take 1/4 cup of maple syrup and three tablespoons of butter and nuke it in the microwave til the butter is melted.

P1050301

Mix in 1/2 teaspoon of cinnamon.

P1050304

Toss over the apples to coat.

P1050306

Pour into a baking dish, pie pan, tart dish (that’s what these are called, right?) or whatever you’d like. No need to grease since you have butter on the apples.

P1050308

Now the crumble topping! Mix 1 cup of flour, 1/2 cup oats, heaping 1/2 cup walnuts, 1/2 teaspoon ground cloves, 1 teaspoon cinnamon and 1/4 teaspoon of salt.

P1050310

Melt 1/2 cup of butter into another 1/3 cup of maple syrup and mix. Oh yum.

P1050313

Crumble / spread over your apples and pop it in a 350 degree oven for 35 minutes.

P1050316

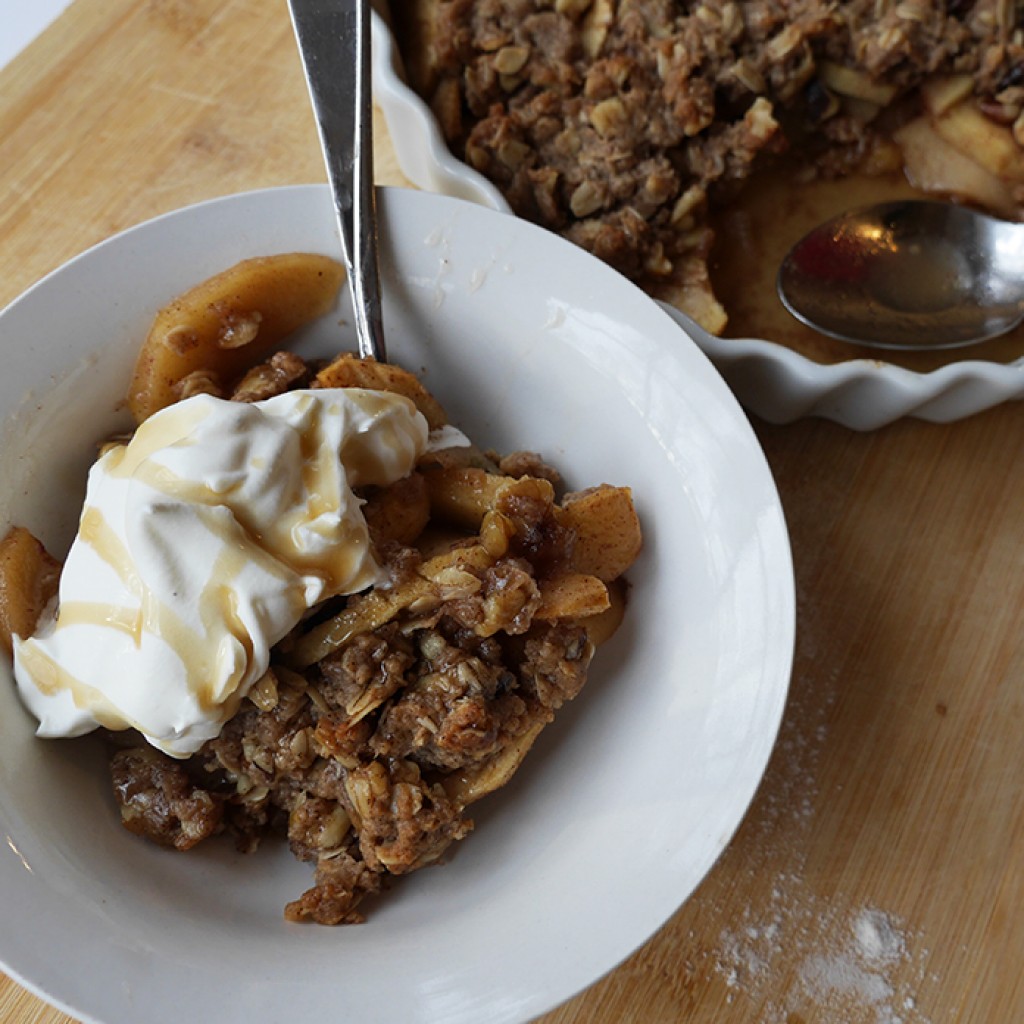
Enjoy when warm with a dollop of whipped cream and drizzle of maple syrup. And some of that extra juicy syrup at the bottom. Yes, please.

finished crisp

Apple Walnut Apple Crisp Southern Mothers

I know what I’m having for breakfast tomorrow.


Maple Walnut Apple Crisp 

5 apples, peeled and sliced

3 TBS butter

1/4 cup maple syrup

1/2 tsp cinnamon

For the Topping:

1 cup flour

1/2 cup oats

1/2 cup (heaping) chopped walnuts

1 tsp cinnamon

1/2 tsp ground cloves

1/4 tsp salt

1/2 cup melted butter

1/3 cup maple syrup

Preheat oven to 350. Peel and slice apples and toss in melted butter, syrup and cinnamon. Pour into baking dish. Mix all dry topping ingredients. Melt butter into syrup in microwave and mix with the dry ingredients til wet and crumbly.  Spread/crumble topping over apples. Bake for approximately 35 minutes until apples are tender and topping is nice and crisp. Serve warm, with whipped cream and additional syrup.

Enjoy!


signature

Southern Chicken Pot Pie

DSC_0421

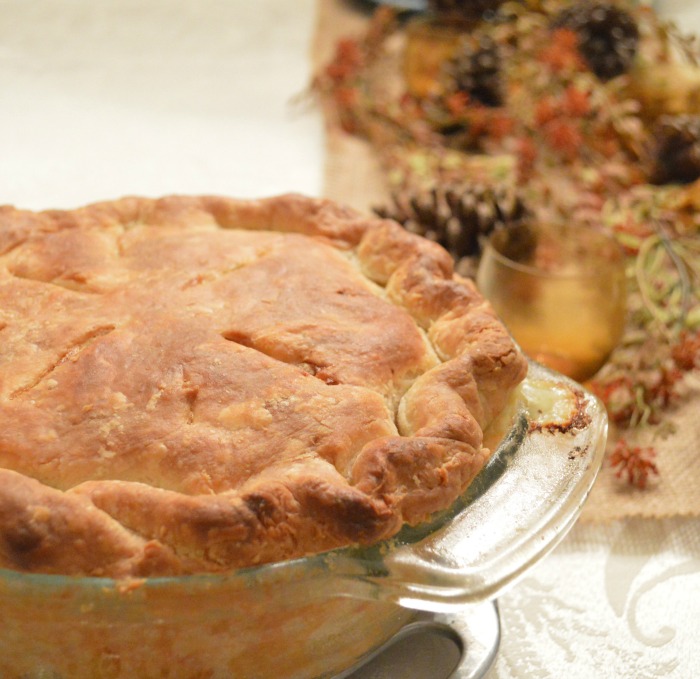
I looooooooooooovvvvvveee chicken pot pie. Like. So Much. And it can’t get more Southern than this: coming home to Mama pulling out a golden brown chicken pot pie, loaded with creamy, vegetable, chicken goodness.  I grew up with vegetable-less chicken pie because I was a silly picky eater.  We always ate it on top of rice with sides of green beans and corn.  This pot pie recipe is the love child of the traditional veggie chicken pie and my Mama’s creamy chicken pie recipe. Because I love not sticking to a recipe. And I love onions and veggies now.  Chicken Pot Pie can often vary to extremes based on your preferences.  And I’ve tried them all! Personally, I love the thick, flaky homemade pie crust.  Others like the buttery soft crescent roll type of crust.  Or maybe you’re daring and go crustless!  *gasp* And after having more than my fair share of dry chicken pot pie filling, it is time to remedy that!  No more thick, dry filling.  Only creamy, rich, satisfyingly decadent pie filling here!  No, this pie may not come out in one nice, neat slice, but I promise you won’t regret it.

Pie crust.  Let’s talk pie crust over here for a minute.  Shortening or butter?  Vinegar or not?  3-2-1 ratio or some other ratio of flour, fat, and liquid?  Pastry flour or all-purpose?  Oh, the dilemma.  So many questions!  For the flakiest, most flavorful crust… this will not fail you….

  • 3 cups of all-purpose flour, thoroughly sifted
  • 3/4 cup of butter, cold, cut into squares
  • 1/4 cup shortening, cold
  • 1 tsp. salt
  • 1 tsp. vinegar
  • 1 cup of cold water

Another trick for SUPER knock your socks off flaky crust?  Don’t go pea size with your butter chunks, go rock size.  The bigger the butter, the bigger the pockets in the crust.  Trust me on this.  I also do a combination of butter and shortening because shortening is 100% fat where butter is only 80% fat.  I like the shortening to hold everything together.  But no more than 1/4 cup because you want butter to take center stage!

Rock size butter chunks look something like this…

DSC_0340

Your dough should look something like this when it comes together.

DSC_0344

Flour counter and fold in half once, then in half again.  You want layers upon layers of butter.  Therefore, flaky.  Split in two and wrap in saran wrap and put on the top shelf of your fridge where the freezer air comes out for at least one hour.  You want these babies ice cold.

Meanwhile, you can be working on your filling.  Put a few breasts of chicken into a saucepan and generously salt and pepper.  Cover with water about 2 inches over the breasts.  Boil for about 10 minutes or until juices run clear.  SAVE the chicken water!  <–you’ll need this later.  Cool on a cutting board and chop or shred chicken into small pieces.  I do a little combination of both.  I like smaller pieces because I want every bite to have a piece of chicken in it!  Mine looks something like this, but do whatever your heart wants… this is YOUR chicken pot pie.

DSC_0369

Now, it’s time for some veg.  I’m boycotting the whole peas and corn thing.  No thank you.  I’m all about the classic mirepoix mix: onions, carrots, and celery.  That’s all you need.  No, peas!  No, corn!  Just go home.

DSC_0363

And if you happen to have a little green onions and garlic that want to come to the party, then let them.   They add a little somethin’ somethin’.

Time to pull out “Big Red” and do some sauteein’! First, melt one stick of butter in a dutch oven or stockpot.

DSC_0375

Then add your mirepoix.  Saute for about 5-10 minutes over medium high heat until tender.

DSC_0378

Add green onions and garlic and saute a few minutes more.

DSC_0382

Then add 1/4 cup of flour.

DSC_0383

And it will soak up all the butter like so.

DSC_0385

Remember that chicken water I told you to save?  Add 2 cups of that to the veggies along with 1 cup of milk and salt and pepper to taste.

DSC_0387

Time to cheat a little and add 3 heaping spoonfuls of condensed cream of chicken soup.

DSC_0391

Simmer on low until heated through and thick, then add your chopped chicken and turn off the heat.

DSC_0393

It might look like soup.  And that is GOOD.  No dry pot pie here.

Take your crusts out of the fridge and roll them out and place the bottom half in a deep 1.5 qt. round baking dish.  Fill with the pie filling.  THEN, you’ll slice some Velveeta (or any melting cheese of choice) and lay it on top.  Weird?  Yes.  Good?  Yes!  I mean who says no to cheese…

DSC_0394

Take the other half of your pie crust, roll it out and lay over the top.  Do your awesome pie magic skills and make a fancy design if you want to.  I’ll just go novice and do that classic pinch rim.

DSC_0397

Add some vents and bake in a 400 degree oven for about 40 minutes or until crust is golden brown.

Fast forward 40 minutes. *insert Jeopardy theme here*

Southern Chicken Pot Pie- flakiest crust, creamiest filling

Hello, pie.  I think I love you.

Now, let me just show you the flakiness of the crust.

DSC_0423

^ Yeah?  Yeah?  You see that?  If it goes crunch, congrats.

Let me just serve some ‘o dat up with some rice, and I’m in pure Southern comfort right there.

DSC_0434

Southern Chicken Pot Pie


INGREDIENTS:

Recipe for 2 pie crusts (see above)

2 large chicken breasts, salted and peppered, boiled and shredded

1 stick of butter (1/4 cup)

1 whole onion, chopped

2 celery stalks, chopped

1 cup of chopped carrots

3 green onions, chopped

2 garlic cloves, minced

1/4 cup flour

2 cups of water that chicken was boiled in

1 cup of milk

1 tsp. salt

1 tsp. pepper

3 heaping spoonfuls of condensed cream of chicken soup

5-6 slices of Velveeta cheese

PREPARATION:

Make pie crust and chill in refrigerator.  Put chicken breasts in saucepan and generously salt and pepper.  Pour water about 2 inches over the chicken and boil for about 10 minutes until juices run clear.  Cool chicken on a cutting board.  Once cooled, chop or shred chicken and set aside.  Preheat oven to 400 degrees.  In dutch oven or stockpot, melt 1 stick of butter.  Add chopped mirepoix mix and saute for 5-10 minutes until tender.  Add green onions and garlic and saute a minute more.  Add 1/4 cup flour and stir.  Add 2 cups of leftover water from boiling the chicken along with 1 cup of milk.  Season with salt and pepper.  Add 3 heaping large spoonfuls of cream of chicken soup.  Simmer on low for 5 minutes until heated through and thick.  Turn off heat and add chopped chicken.  Meanwhile, take crust out of fridge and roll into 2 crusts.  Place one crust on bottom of a deep 1.5 quart baking dish.  Spoon in pie filling.  Top with sliced velveeta cheese.  Then, place top of crust on pie and crimp edges and vent the top.  Bake for 40 minutes or until crust is golden brown.

***Options:  Make an egg wash for the crust by mixing one egg with a Tbsp. of water and brushing over top of pie crust and add sea salt and fresh cracked pepper!

signaturetransparent